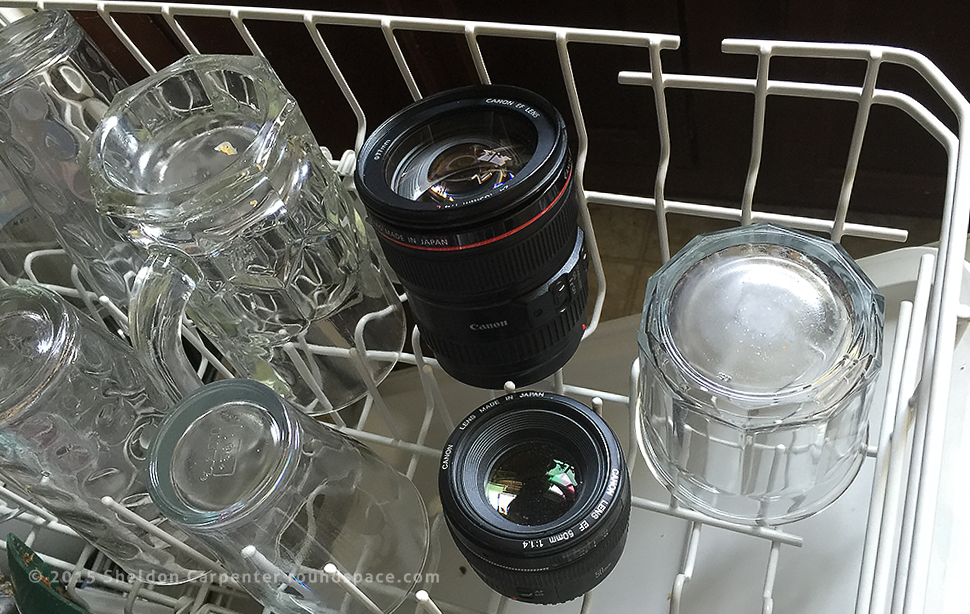
Though you may be tempted, this is NOT the way to clean your lenses
Stop right now and look at your camera lens’ front glass. Is it clean? Based on this simple observation I go by two rules:
- If it’s not really dirty, don’t clean it.
- If it is dirty, clean only the areas that need cleaning carefully.
How dirty is dirty?
I’ve known photographers who clean their lenses religiously prior to every shoot. For the most part, it won’t harm the lens, as the front glass on any camera lens is one of the hardest pieces of glass in the whole camera. More than anything it probably ends up costing more than it needs. Still, overzealous or improper cleaning can affect the coating and possibly scratch the glass. The basic rule of thumb here is clean your lenses as infrequently as possible.
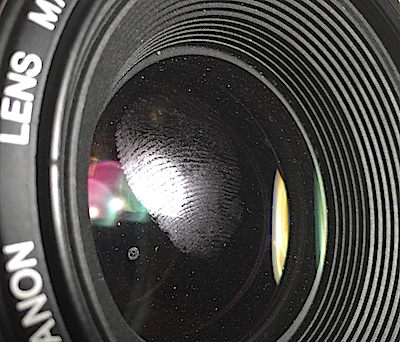
Ok, this lens needs cleaning
If your lens has a tiny speck or two near an edge, you may want to forgo cleaning until a later time, since it’s unlikely to affect your image. Also, a small amount of dust inside the lens is not going to affect image quality, either. Zoom lenses “breathe” as they expand and contract, pulling air and dust particles into the interior of the lens. It’s normal and nothing to be concerned about. Brand new lenses, fresh from the factory, can have dust in them. So, a tiny bit of dirt on your lens and some dust inside is ok and won’t affect your images. Heck, one lens had a dead fly trapped inside and it didn’t affect image quality at all (Note: removing dead bugs from inside your lens is not covered here, but you can read about it at the lensrentals.com Web site).
If the lens has fingerprints on it, smudges from handling, water-drop marks, dog nose prints, peanut butter or anything else that obviously looks terrible, cleaning is probably in order.
Time to clean
If you haven’t guessed by now, the top image is a joke. Please DO NOT clean your lenses or any part of your camera in a dishwasher. I wish it were that simple.
If you’ve truly determined that the front glass of your lens needs cleaning, you need some tools to do the job. Here are the things I use to clean my lenses (Please note, I am not getting any endorsements from the manufacturers. All links are to Amazon, but you can get these anywhere):
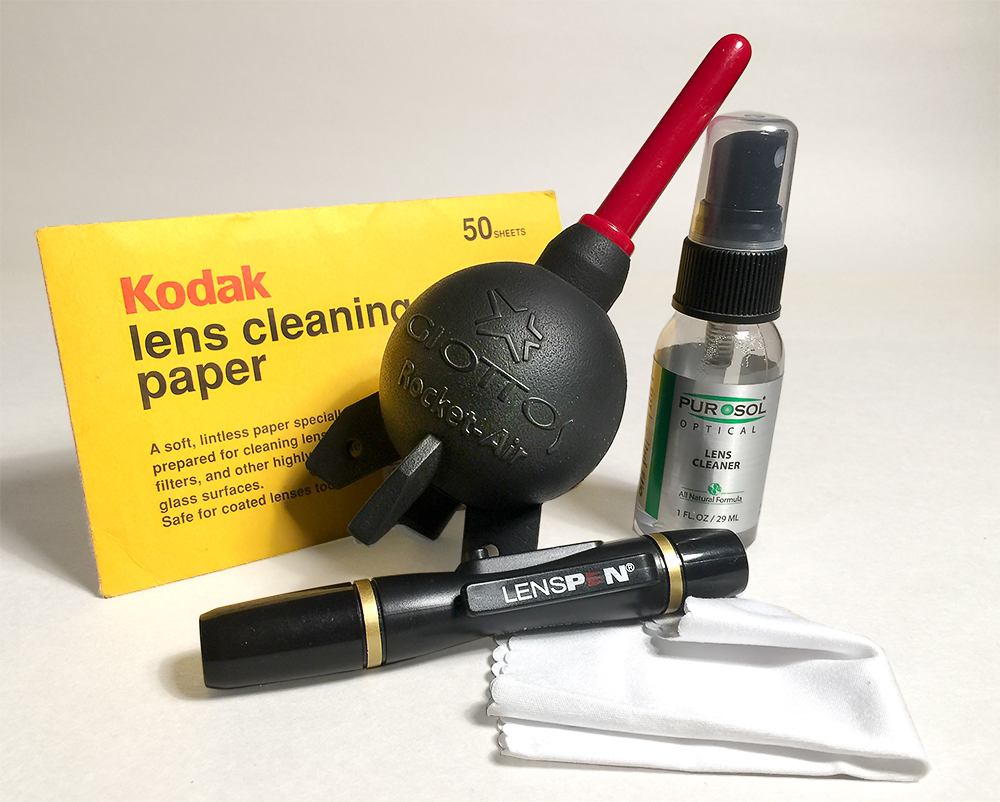
- A bulb blower. I like my Giotto’s Rocket-Air. It works extremely well to blow away loose particles.
- A LensPen. This has a carbon-fiber brush on one end and a microfiber pad on the other end. It works wonders for most smudges.
- An inexpensive option for the bulb blower and LensPen is a blower brush. I advise taking the brush off the blower and using them as separate tools.
- For stubborn smudges I use Purosol lens cleaning solution, though any good lens cleaning solution will work. Do not use window-cleaning solutions or acetone as these will degrade or remove lens coatings and ruin your lens.
- A clean microfiber cloth that you can get anywhere. You can also use lens tissues. Regarding microfiber cloths, don’t hang onto them for too long. They will get dirty with use, and you don’t want to use a dirty cloth to clean your lens.
Step one, blow the crud away: Using the blower bulb, blow away any loose stuff. I usually do this compulsively, even if I don’t see anything.
Step two, brush next: If there are stubborn specks, use the brush end of the LensPen to physically sweep away anything that may be lodged in a crevice or just being stubborn.
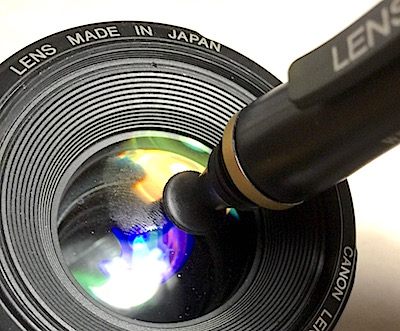 Step three, de-smudge: If there is a smudge or fingerprint, often the pad of the LensPen or the gentle use of a microfiber cloth will remove it. Rub radially, following the shape of the lens, rather than across, so that any minor streaks will be less likely to show. Use only enough pressure to remove the smudge.
Step four, the liquid treatment: Do this if the previous three steps haven’t removed all your smudges.
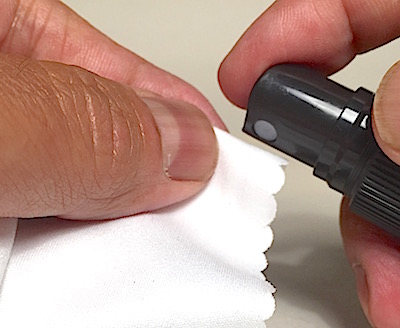 As tempting as it may be, never spray or apply cleaning solutions directly to the lens. The liquid can seep into the edges around the glass and potentially leak inside. Instead, spray or apply the liquid to a corner or edge of a microfiber cloth or lens tissue.
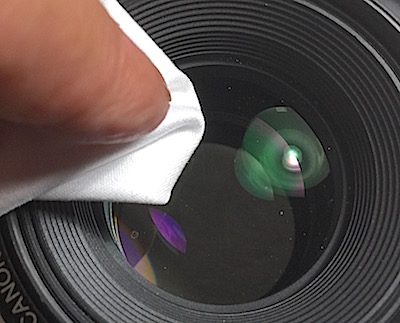 Gently rub just the smudge, again, radially, with only enough pressure to remove it. Move to a dry spot on the microfiber cloth or tissue and dry the area. Touch up with the dry part of the microfiber cloth or LensPen if any light smudges remain.
The Rear Element
If you have a digital SLR, chances are you change lenses once in a while. The likelihood of getting dirt or smudges on the rear element is pretty small, but it can happen.
If the lens is a zoom lens, the rear element may have a large gap around the lens that actually exposes the insides of the lens body. Be careful using the blower if this is the case, as you can blow particles into the body. Be just as careful cleaning the rear element as the front, otherwise. The glass is softer here, and scratches at the rear will affect the image quality.
What if it still looks dirty?
After cleaning your lens, you look through the viewfinder and specks of dirt still show up! What the heck? Some possibilities exist that won’t affect your picture quality:
- Your eyepiece is dirty. You can clean it with a cotton swab and some lens cleaning fluid.
- Your mirror is dusty. This is pretty rare, I’ve found. With your lens off and under a good light, see if there is dust or smudges on your mirror. First of all don’t touch it! Blow it off with your blower. You can lightly brush with the LensPen if dust persists. I seriously recommend not using any wet cleaning methods.
- The focus screen is dusty. Unless you feel comfortable disassembling your camera slightly, either ignore the dust here or take it to a pro to clean. It doesn’t affect your image quality in any way.
- The sensor is dusty. This is the one aspect that affects image quality. Dust is stuck to the sensor itself, causing specks to show up on images. Cleaning the sensor is not rocket surgery, so you can do it if you want to venture forth. Many camera owners opt to let a camera store do it for them.
You’re done!
After all that, your lens should be clean and  ready to get back in the action. If you plan on getting into a dirty environment, consider getting a lens filter to protect the cleanliness and offer a bit of safety to your lens. See my article here about lens filters.
Lastly, be aware that not all environments are safe for cameras and lenses. Never change lenses in a dusty, wet or rainy environment, and stay away from Color Run events unless you keep your distance. Otherwise that small dust problem will become a big one, as the millions of particles of color can get pulled into your lens. Here’s another article from lensrentals.com about what that looks like.
Stay focused, and have fun!